To make a view draggable in Android, use FrameLayout as the parent container and implement View.OnTouchListener. In ACTION_DOWN, capture the offset between view position and touch coordinates. In ACTION_MOVE, update view position using setX() and setY() with raw touch coordinates plus the offset. For drag and drop between views, use the built-in drag and drop framework with ClipData, DragShadowBuilder, and OnDragListener.
You want to add a floating button that users can drag around the screen. Or maybe you need a draggable card that moves smoothly with the user’s finger. This is a common pattern in Android apps, from chat heads to floating action buttons to custom drag and drop interfaces.
The good news: making views draggable in Android is straightforward once you understand touch event handling. The bad news: there are several approaches, each with tradeoffs. This guide covers both the simple OnTouchListener approach and the more powerful drag and drop framework, plus the gotchas that trip up developers.
The Two Approaches: Simple Dragging vs Drag and Drop
Android offers two ways to make views draggable:
- OnTouchListener approach: Simple dragging within a container. Good for floating buttons, draggable cards, or any view that moves freely.
- Drag and Drop framework: Full drag and drop between views with visual feedback. Good for reordering lists, moving items between containers, or complex drag operations.
Most apps start with OnTouchListener because it’s simpler. But if you need to drag items between different views or show drop zones, the drag and drop framework is the right choice.
graph TB
    A[Need Draggable View] --> B{What's the use case?}
    B -->|Floating button<br/>Simple dragging| C[OnTouchListener]
    B -->|Drag between views<br/>Drop targets<br/>Visual feedback| D[Drag and Drop Framework]

    C --> E[FrameLayout parent]
    C --> F[Handle ACTION_DOWN/MOVE/UP]
    C --> G[Update view position]

    D --> H[ClipData for data]
    D --> I[DragShadowBuilder for visual]
    D --> J[OnDragListener for targets]

    style C fill:#dbeafe,stroke:#3b82f6,stroke-width:2px
    style D fill:#dcfce7,stroke:#16a34a,stroke-width:2px
    style E fill:#f3f4f6,stroke:#6b7280,stroke-width:1px
    style F fill:#f3f4f6,stroke:#6b7280,stroke-width:1px
    style G fill:#f3f4f6,stroke:#6b7280,stroke-width:1px
    style H fill:#f3f4f6,stroke:#6b7280,stroke-width:1px
    style I fill:#f3f4f6,stroke:#6b7280,stroke-width:1px
    style J fill:#f3f4f6,stroke:#6b7280,stroke-width:1px
Let’s start with the simpler approach.
Approach 1: Simple Dragging with OnTouchListener
This is what you use when you want a view that follows the user’s finger. Think floating action buttons, draggable cards, or any view that moves freely on screen.
Step 1: Use FrameLayout as the Parent
FrameLayout is the key. Unlike LinearLayout or RelativeLayout, FrameLayout lets children overlap and be positioned anywhere. This is essential for draggable views.
1
2
3
4
5
6
7
8
9
10
11
12
13
14
15
16
17
18
19
20
21
22
23
24
25
26
27
28
29
30
<?xml version="1.0" encoding="utf-8"?>
<FrameLayout
    xmlns:android="http://schemas.android.com/apk/res/android"
    android:layout_width="match_parent"
    android:layout_height="match_parent">

    <!-- Your main content -->
    <ScrollView
        android:layout_width="match_parent"
        android:layout_height="match_parent">

        <LinearLayout
            android:layout_width="match_parent"
            android:layout_height="wrap_content"
            android:orientation="vertical">

            <!-- Your content here -->
        </LinearLayout>
    </ScrollView>

    <!-- Draggable view floats above -->
    <ImageButton
        android:id="@+id/draggable_view"
        android:layout_width="64dp"
        android:layout_height="64dp"
        android:layout_gravity="bottom|end"
        android:layout_margin="16dp"
        android:src="@drawable/ic_drag_handle"/>

</FrameLayout>
The draggable view is declared last in the XML, so it renders on top. The layout_gravity sets its initial position.
Step 2: Implement OnTouchListener
The core logic lives in the onTouch method. Here’s the complete implementation:
1
2
3
4
5
6
7
8
9
10
11
12
13
14
15
16
17
18
19
20
21
22
23
24
25
26
27
28
29
30
31
32
33
34
35
36
37
38
39
40
41
42
43
44
45
46
47
48
49
50
51
52
53
import android.os.Bundle;
import android.view.MotionEvent;
import android.view.View;
import android.widget.Toast;
import androidx.appcompat.app.AppCompatActivity;

public class DraggableActivity extends AppCompatActivity implements View.OnTouchListener {
    private float dX, dY;
    private int lastAction;

    @Override
    protected void onCreate(Bundle savedInstanceState) {
        super.onCreate(savedInstanceState);
        setContentView(R.layout.activity_draggable);

        View dragView = findViewById(R.id.draggable_view);
        dragView.setOnTouchListener(this);
    }

    @Override
    public boolean onTouch(View view, MotionEvent event) {
        switch (event.getActionMasked()) {
            case MotionEvent.ACTION_DOWN:
                // Capture the offset between view position and touch point
                dX = view.getX() - event.getRawX();
                dY = view.getY() - event.getRawY();
                lastAction = MotionEvent.ACTION_DOWN;
                break;

            case MotionEvent.ACTION_MOVE:
                // Update view position to follow touch
                view.setX(event.getRawX() + dX);
                view.setY(event.getRawY() + dY);
                lastAction = MotionEvent.ACTION_MOVE;
                break;

            case MotionEvent.ACTION_UP:
                // Handle click if no movement occurred
                if (lastAction == MotionEvent.ACTION_DOWN) {
                    handleClick(view);
                }
                break;

            default:
                return false;
        }
        return true; // Consume the event
    }

    private void handleClick(View view) {
        Toast.makeText(this, "Clicked!", Toast.LENGTH_SHORT).show();
    }
}
Understanding the Offset Calculation
The trickiest part is understanding why we need dX and dY. When the user touches the view, they might touch anywhere on it—the center, the edge, or a corner. If you just set the view position to the touch coordinates, the view jumps so its top-left corner aligns with the touch point. That feels wrong.
The offset fixes this:
sequenceDiagram
    participant User
    participant View
    participant TouchEvent

    User->>View: Touch at (screenX, screenY)
    View->>TouchEvent: getRawX(), getRawY()
    TouchEvent-->>View: Returns screen coordinates

    Note over View: Calculate offset:<br/>dX = view.getX() - event.getRawX()<br/>dY = view.getY() - event.getRawY()

    User->>View: Move finger to (newX, newY)
    View->>View: newPosition = (newX + dX, newY + dY)

    Note over View: View moves smoothly,<br/>maintaining touch point
Example: Say the view is at position (100, 200) and the user touches at screen coordinate (120, 220). The offset is (100 - 120, 200 - 220) = (-20, -20). When the user moves their finger to (150, 250), the view moves to (150 + (-20), 250 + (-20)) = (130, 230). The touch point stays under the finger the entire time.
Handling Clicks vs Drags
You can’t use OnClickListener alongside OnTouchListener because the touch listener consumes the event. Instead, detect clicks by checking if ACTION_UP happens immediately after ACTION_DOWN without any ACTION_MOVE in between.
For better click detection, use a movement threshold:
1
2
3
4
5
6
7
8
9
10
11
12
13
14
15
16
17
18
19
20
21
22
23
24
25
26
27
28
29
30
31
32
33
private static final float CLICK_THRESHOLD = 10f; // pixels
private float initialX, initialY;

@Override
public boolean onTouch(View view, MotionEvent event) {
    switch (event.getActionMasked()) {
        case MotionEvent.ACTION_DOWN:
            initialX = event.getRawX();
            initialY = event.getRawY();
            dX = view.getX() - event.getRawX();
            dY = view.getY() - event.getRawY();
            lastAction = MotionEvent.ACTION_DOWN;
            break;

        case MotionEvent.ACTION_MOVE:
            view.setX(event.getRawX() + dX);
            view.setY(event.getRawY() + dY);
            lastAction = MotionEvent.ACTION_MOVE;
            break;

        case MotionEvent.ACTION_UP:
            if (lastAction == MotionEvent.ACTION_DOWN) {
                float deltaX = Math.abs(event.getRawX() - initialX);
                float deltaY = Math.abs(event.getRawY() - initialY);

                if (deltaX < CLICK_THRESHOLD && deltaY < CLICK_THRESHOLD) {
                    handleClick(view);
                }
            }
            break;
    }
    return true;
}
This treats small movements as clicks, which is more forgiving for users with shaky hands.
Keeping Views Within Screen Bounds
By default, the view can be dragged off screen. To prevent this, clamp the position:
1
2
3
4
5
6
7
8
9
10
11
12
13
14
15
16
17
case MotionEvent.ACTION_MOVE:
    float newX = event.getRawX() + dX;
    float newY = event.getRawY() + dY;

    // Get parent dimensions (works on all API levels)
    View parent = (View) view.getParent();
    int maxWidth = parent.getWidth();
    int maxHeight = parent.getHeight();

    // Clamp to parent bounds
    newX = Math.max(0, Math.min(newX, maxWidth - view.getWidth()));
    newY = Math.max(0, Math.min(newY, maxHeight - view.getHeight()));

    view.setX(newX);
    view.setY(newY);
    lastAction = MotionEvent.ACTION_MOVE;
    break;
On Android 11 (API 30) and later, use WindowInsets to account for system bars like the status bar and navigation bar:
1
2
3
4
5
6
7
8
9
View rootView = findViewById(android.R.id.content);
WindowInsets insets = rootView.getRootWindowInsets();
int statusBarHeight = insets.getSystemWindowInsetTop();
int navBarHeight = insets.getSystemWindowInsetBottom();

// Adjust available height for system bars
View parent = (View) view.getParent();
int availableHeight = parent.getHeight() - statusBarHeight - navBarHeight;
newY = Math.max(statusBarHeight, Math.min(newY, availableHeight - view.getHeight()));
Approach 2: Drag and Drop Framework
When you need to drag items between different views or show drop zones, use Android’s drag and drop framework. It provides visual feedback, drop target highlighting, and a structured lifecycle.
The Drag and Drop Lifecycle
The framework has four stages:
stateDiagram-v2
    [*] --> Started: startDrag() called
    Started --> Continuing: User moves dragged item
    Continuing --> Continuing: ACTION_DRAG_ENTERED<br/>ACTION_DRAG_EXITED<br/>ACTION_DRAG_LOCATION
    Continuing --> Dropped: User releases over valid target
    Continuing --> Ended: User releases outside target
    Dropped --> Ended: Drop handled
    Ended --> [*]

    note right of Started
        ACTION_DRAG_STARTED
        sent to all listeners
    end note

    note right of Dropped
        ACTION_DROP
        sent to drop target
    end note

    note right of Ended
        ACTION_DRAG_ENDED
        sent to all listeners
    end note
Implementing Drag and Drop
Here’s a complete example that lets you drag a view and drop it on a target:
Layout:
1
2
3
4
5
6
7
8
9
10
11
12
13
14
15
16
17
18
19
20
21
22
23
24
25
26
27
28
29
30
<LinearLayout
    android:layout_width="match_parent"
    android:layout_height="match_parent"
    android:orientation="vertical">

    <!-- Draggable source -->
    <ImageView
        android:id="@+id/drag_source"
        android:layout_width="100dp"
        android:layout_height="100dp"
        android:src="@drawable/ic_drag_item"
        android:contentDescription="Drag me"/>

    <!-- Drop target -->
    <FrameLayout
        android:id="@+id/drop_target"
        android:layout_width="match_parent"
        android:layout_height="0dp"
        android:layout_weight="1"
        android:background="#E3F2FD"
        android:padding="16dp">

        <TextView
            android:layout_width="wrap_content"
            android:layout_height="wrap_content"
            android:layout_gravity="center"
            android:text="Drop here"
            android:textSize="18sp"/>
    </FrameLayout>
</LinearLayout>
Activity:
1
2
3
4
5
6
7
8
9
10
11
12
13
14
15
16
17
18
19
20
21
22
23
24
25
26
27
28
29
30
31
32
33
34
35
36
37
38
39
40
41
42
43
44
45
46
47
48
49
50
51
52
53
54
55
56
57
58
59
60
61
62
63
64
65
66
67
68
69
70
71
72
public class DragDropActivity extends AppCompatActivity {
    private ImageView dragSource;
    private FrameLayout dropTarget;

    @Override
    protected void onCreate(Bundle savedInstanceState) {
        super.onCreate(savedInstanceState);
        setContentView(R.layout.activity_drag_drop);

        dragSource = findViewById(R.id.drag_source);
        dropTarget = findViewById(R.id.drop_target);

        // Make source draggable
        dragSource.setOnLongClickListener(v -> {
            ClipData.Item item = new ClipData.Item("Dragged item data");
            String[] mimeTypes = {ClipDescription.MIMETYPE_TEXT_PLAIN};
            ClipData dragData = new ClipData("Label", mimeTypes, item);

            View.DragShadowBuilder shadowBuilder = new View.DragShadowBuilder(v);
            v.startDragAndDrop(dragData, shadowBuilder, null, 0);
            return true;
        });

        // Set up drop target
        dropTarget.setOnDragListener(new DropTargetListener());
    }

    private class DropTargetListener implements View.OnDragListener {
        @Override
        public boolean onDrag(View v, DragEvent event) {
            switch (event.getAction()) {
                case DragEvent.ACTION_DRAG_STARTED:
                    // Drag has started
                    return true;

                case DragEvent.ACTION_DRAG_ENTERED:
                    // Dragged item entered drop target
                    v.setBackgroundColor(getColor(R.color.drop_target_active));
                    return true;

                case DragEvent.ACTION_DRAG_EXITED:
                    // Dragged item left drop target
                    v.setBackgroundColor(getColor(R.color.drop_target_inactive));
                    return true;

                case DragEvent.ACTION_DROP:
                    // Item was dropped
                    ClipData.Item item = event.getClipData().getItemAt(0);
                    String draggedData = item.getText().toString();

                    // Handle the drop
                    handleDrop(draggedData);

                    v.setBackgroundColor(getColor(R.color.drop_target_inactive));
                    return true;

                case DragEvent.ACTION_DRAG_ENDED:
                    // Drag operation ended
                    v.setBackgroundColor(getColor(R.color.drop_target_inactive));
                    return true;

                default:
                    return false;
            }
        }
    }

    private void handleDrop(String data) {
        Toast.makeText(this, "Dropped: " + data, Toast.LENGTH_SHORT).show();
        // Add your drop handling logic here
    }
}
Key Components Explained
ClipData: Carries the data being dragged. Can contain text, URIs, or Intent objects.
1
2
3
ClipData.Item item = new ClipData.Item("My data");
String[] mimeTypes = {ClipDescription.MIMETYPE_TEXT_PLAIN};
ClipData dragData = new ClipData("Description", mimeTypes, item);
DragShadowBuilder: Creates the visual representation during drag. The default shows a semi-transparent copy of the view. You can customize it:
1
2
3
4
5
6
7
8
9
10
11
12
13
14
15
16
17
public class CustomDragShadow extends View.DragShadowBuilder {
    public CustomDragShadow(View view) {
        super(view);
    }

    @Override
    public void onProvideShadowMetrics(Point shadowSize, Point shadowTouchPoint) {
        View view = getView();
        shadowSize.set(view.getWidth(), view.getHeight());
        shadowTouchPoint.set(view.getWidth() / 2, view.getHeight() / 2);
    }

    @Override
    public void onDrawShadow(Canvas canvas) {
        getView().draw(canvas);
    }
}
OnDragListener: Handles drag events on drop targets. Must return true for events you handle.
Drag and Drop vs OnTouchListener
| Feature | OnTouchListener | Drag and Drop Framework |
|---|---|---|
| Complexity | Simple | More complex |
| Use case | Floating buttons, simple dragging | Drag between views, drop targets |
| Visual feedback | None (you build it) | Built-in shadow and highlighting |
| Event handling | Direct touch events | Structured drag lifecycle |
| Performance | Lower overhead | Slightly more overhead |
| Best for | Single container dragging | Multi-view drag operations |
Use OnTouchListener for simple cases. Use the drag and drop framework when you need the structure and visual feedback it provides.
Common Pitfalls and Solutions
1. View Jumps on First Touch
Problem: The view jumps to the touch point instead of moving smoothly.
Cause: Not calculating the offset correctly, or using getX() instead of getRawX().
Solution: Always calculate dX and dY in ACTION_DOWN:
1
2
dX = view.getX() - event.getRawX();  // Not event.getX()
dY = view.getY() - event.getRawY();  // Not event.getY()
2. Click Events Not Working
Problem: OnClickListener doesn’t fire after adding OnTouchListener.
Cause: OnTouchListener consumes the event by returning true.
Solution: Detect clicks manually in ACTION_UP:
1
2
3
4
5
6
case MotionEvent.ACTION_UP:
    if (lastAction == MotionEvent.ACTION_DOWN) {
        // It's a click, not a drag
        performClick();
    }
    break;
3. View Disappears Off Screen
Problem: Users can drag the view completely off screen.
Solution: Clamp coordinates to parent bounds using Math.max() and Math.min() as shown in the “Keeping Views Within Screen Bounds” section above.
4. Dragging Conflicts with Scrolling
Problem: In a ScrollView, dragging the view also scrolls the container.
Solution: Use requestDisallowInterceptTouchEvent():
1
2
3
4
5
6
7
8
case MotionEvent.ACTION_DOWN:
    view.getParent().requestDisallowInterceptTouchEvent(true);
    // ... rest of code
    break;

case MotionEvent.ACTION_UP:
    view.getParent().requestDisallowInterceptTouchEvent(false);
    break;
5. Performance Issues with Complex Views
Problem: Dragging feels laggy with complex views (many children, animations).
Solution: Use View.animate() for smoother movement, or draw a simplified version during drag:
1
2
3
4
5
6
7
case MotionEvent.ACTION_MOVE:
    view.animate()
        .x(event.getRawX() + dX)
        .y(event.getRawY() + dY)
        .setDuration(0)
        .start();
    break;
Or for the drag and drop framework, create a lightweight DragShadowBuilder instead of using the full view.
6. Drag and Drop Not Working on Older Android Versions
Problem: startDragAndDrop() requires API 24+. Older versions need startDrag().
Solution: Use the compatibility method:
1
2
3
4
5
if (Build.VERSION.SDK_INT >= Build.VERSION_CODES.N) {
    view.startDragAndDrop(dragData, shadowBuilder, null, 0);
} else {
    view.startDrag(dragData, shadowBuilder, null, 0);
}
Best Practices
1. Use Appropriate Parent Layout
FrameLayout is ideal for draggable views because it allows free positioning. Avoid ConstraintLayout or RelativeLayout for the draggable view’s direct parent—they enforce positioning constraints that interfere with programmatic movement.
2. Provide Visual Feedback
During drag, show visual feedback. For OnTouchListener, you might change the view’s alpha or scale:
1
2
3
4
5
6
7
8
9
10
11
case MotionEvent.ACTION_DOWN:
    view.setAlpha(0.7f);
    view.setScaleX(1.1f);
    view.setScaleY(1.1f);
    break;

case MotionEvent.ACTION_UP:
    view.setAlpha(1.0f);
    view.setScaleX(1.0f);
    view.setScaleY(1.0f);
    break;
The drag and drop framework provides this automatically via DragShadowBuilder, but you can still enhance drop targets with color changes.
3. Save Position on Drag End
For floating buttons, save the final position so it persists across app restarts:
1
2
3
4
5
6
7
case MotionEvent.ACTION_UP:
    SharedPreferences prefs = getSharedPreferences("app_prefs", MODE_PRIVATE);
    prefs.edit()
        .putFloat("button_x", view.getX())
        .putFloat("button_y", view.getY())
        .apply();
    break;
Restore in onCreate():
1
2
3
4
5
6
7
SharedPreferences prefs = getSharedPreferences("app_prefs", MODE_PRIVATE);
float savedX = prefs.getFloat("button_x", -1);
float savedY = prefs.getFloat("button_y", -1);
if (savedX >= 0 && savedY >= 0) {
    dragView.setX(savedX);
    dragView.setY(savedY);
}
4. Handle Configuration Changes
When the screen rotates, views reset to their XML positions. Save state and restore it:
1
2
3
4
5
6
7
8
9
10
11
12
13
14
15
16
17
18
19
20
21
@Override
protected void onSaveInstanceState(Bundle outState) {
    super.onSaveInstanceState(outState);
    View dragView = findViewById(R.id.draggable_view);
    outState.putFloat("drag_x", dragView.getX());
    outState.putFloat("drag_y", dragView.getY());
}

@Override
protected void onRestoreInstanceState(Bundle savedInstanceState) {
    super.onRestoreInstanceState(savedInstanceState);
    float x = savedInstanceState.getFloat("drag_x");
    float y = savedInstanceState.getFloat("drag_y");

    // Use post() because the view may not be laid out yet
    View dragView = findViewById(R.id.draggable_view);
    dragView.post(() -> {
        dragView.setX(x);
        dragView.setY(y);
    });
}
5. Test on Different Screen Sizes
Draggable views behave differently on phones vs tablets. Test boundary clamping and ensure the view doesn’t get stuck in corners on large screens.
6. Consider Accessibility
Draggable views can be hard for users with motor impairments. Provide an alternative way to access the functionality, or make the drag threshold larger for easier activation.
Real-World Examples
Floating Action Button with Drag
Many apps use draggable floating action buttons. Here’s a minimal implementation:
1
2
3
4
5
6
7
8
9
10
11
12
13
14
15
16
17
18
19
20
21
22
23
24
25
26
27
28
29
30
31
32
33
34
35
36
37
38
39
40
public class FloatingButtonActivity extends AppCompatActivity {
    private FloatingActionButton fab;

    @Override
    protected void onCreate(Bundle savedInstanceState) {
        super.onCreate(savedInstanceState);
        setContentView(R.layout.activity_main);

        fab = findViewById(R.id.fab);
        fab.setOnTouchListener(new FabDragListener());
    }

    private class FabDragListener implements View.OnTouchListener {
        private float dX, dY;

        @Override
        public boolean onTouch(View view, MotionEvent event) {
            switch (event.getAction()) {
                case MotionEvent.ACTION_DOWN:
                    dX = view.getX() - event.getRawX();
                    dY = view.getY() - event.getRawY();
                    break;

                case MotionEvent.ACTION_MOVE:
                    float newX = event.getRawX() + dX;
                    float newY = event.getRawY() + dY;

                    // Keep within parent bounds
                    View parent = (View) view.getParent();
                    newX = Math.max(0, Math.min(newX, parent.getWidth() - view.getWidth()));
                    newY = Math.max(0, Math.min(newY, parent.getHeight() - view.getHeight()));

                    view.setX(newX);
                    view.setY(newY);
                    break;
            }
            return true;
        }
    }
}
Drag to Reorder List Items
For reordering list items, use the drag and drop framework with RecyclerView:
1
2
3
4
5
6
7
8
9
10
11
12
13
14
15
16
17
18
19
20
21
22
ItemTouchHelper.SimpleCallback callback = new ItemTouchHelper.SimpleCallback(
    ItemTouchHelper.UP | ItemTouchHelper.DOWN,
    ItemTouchHelper.LEFT | ItemTouchHelper.RIGHT
) {
    @Override
    public boolean onMove(RecyclerView recyclerView,
                         RecyclerView.ViewHolder viewHolder,
                         RecyclerView.ViewHolder target) {
        int fromPos = viewHolder.getAdapterPosition();
        int toPos = target.getAdapterPosition();
        adapter.moveItem(fromPos, toPos);
        return true;
    }

    @Override
    public void onSwiped(RecyclerView.ViewHolder viewHolder, int direction) {
        adapter.removeItem(viewHolder.getAdapterPosition());
    }
};

ItemTouchHelper touchHelper = new ItemTouchHelper(callback);
touchHelper.attachToRecyclerView(recyclerView);
This is simpler than implementing drag and drop manually and provides built-in animations.
When to Use Each Approach
Use OnTouchListener when:
- You need a simple floating button or draggable card
- The view moves within a single container
- You want minimal code and dependencies
- Performance is critical
Use Drag and Drop Framework when:
- You need to drag items between different views
- You want visual feedback (shadows, highlighting)
- You have multiple drop targets
- You need structured drag lifecycle events
Don’t use either when:
- Standard scrolling or swiping would work better
- The interaction is confusing for users
- You can use RecyclerView’s built-in drag handlers instead
Modern Alternatives: Jetpack Compose
If you’re building new screens with Jetpack Compose, drag and drop is built in:
1
2
3
4
5
6
7
8
9
10
11
12
13
14
15
16
17
18
19
@Composable
fun DraggableBox() {
    var offsetX by remember { mutableStateOf(0f) }
    var offsetY by remember { mutableStateOf(0f) }

    Box(
        modifier = Modifier
            .offset { IntOffset(offsetX.toInt(), offsetY.toInt()) }
            .pointerInput(Unit) {
                detectDragGestures { change, dragAmount ->
                    change.consume()
                    offsetX += dragAmount.x
                    offsetY += dragAmount.y
                }
            }
            .size(100.dp)
            .background(Color.Blue)
    )
}
Compose’s drag handling is declarative and integrates with the composition system. For existing View-based code, stick with OnTouchListener or the drag and drop framework.
Wrapping Up
Making views draggable in Android comes down to understanding touch events and choosing the right approach. For simple cases, OnTouchListener with FrameLayout is the quickest path. For complex drag and drop scenarios, the framework provides structure and visual feedback.
The key takeaways:
- FrameLayout enables free positioning: Use it as the parent for draggable views
- Calculate offset in ACTION_DOWN: This prevents the view from jumping to the touch point
- Use getRawX() and getRawY(): These give screen coordinates, not view-relative coordinates
- Handle clicks manually: OnTouchListener consumes events, so detect clicks in ACTION_UP
- Clamp to screen bounds: Prevent views from disappearing off screen
- Choose the right approach: OnTouchListener for simple dragging, drag and drop framework for complex scenarios
The code examples in this guide are production-ready starting points. Adapt them to your needs, add boundary checking, save positions, and test on different devices. Draggable views can enhance UX when used thoughtfully, but avoid overusing them—not everything needs to be draggable.
For more Android development guides, check out Android Custom Animations for view animations, Android Data Binding for declarative UI, and Android UI for Beginners for layout fundamentals.
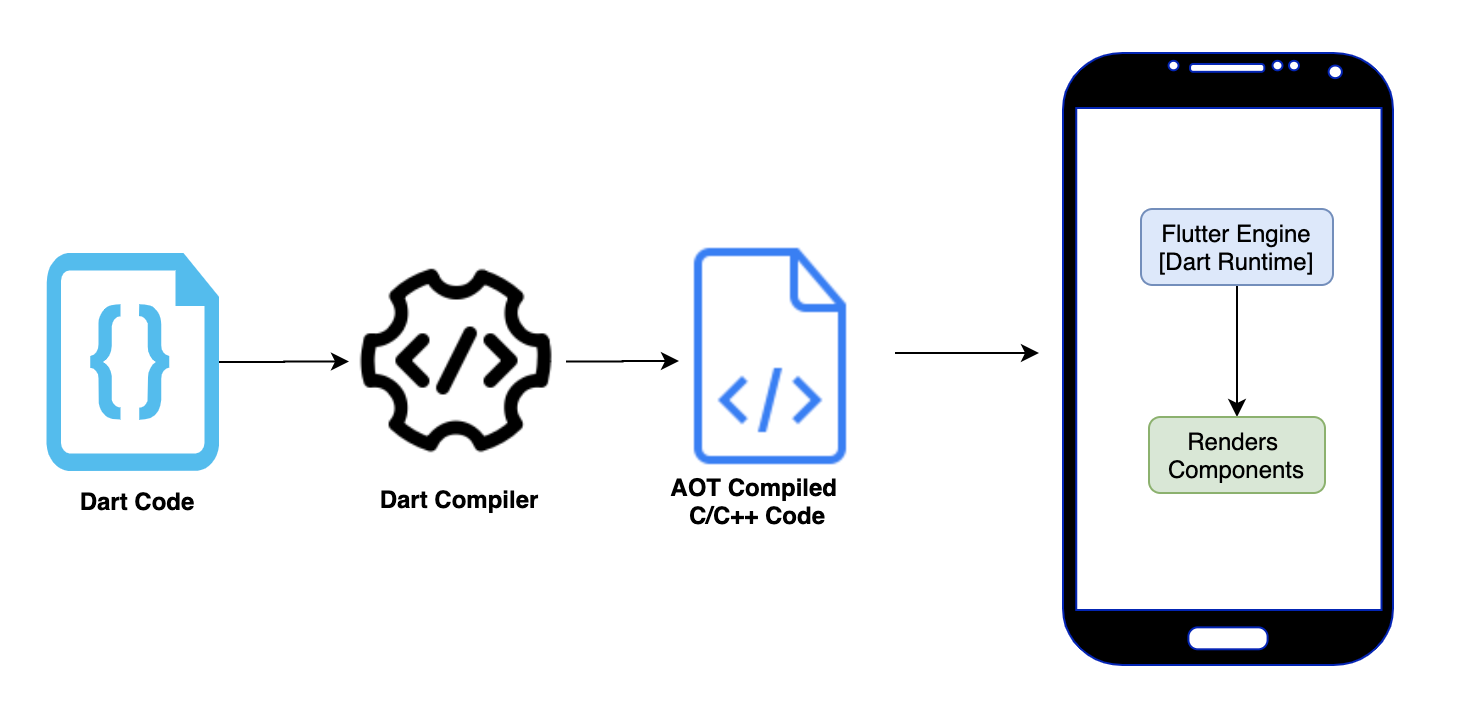
Building mobile apps? See Flutter Under the Hood for cross-platform development, Android CI/CD with GitHub Actions for automation, and Offline Mode in Android Apps for handling network connectivity.
References: Android Developer Guide: Drag and Drop, Android Touch Event Handling, Vogella Android Drag and Drop Tutorial